Team 5 – Watch Strap for People With Charcot-Marie-Tooth

Our team took a different path compared with other teams. At the beginning of the semester, we were focusing on inventing a glove for people with disabilities to eat so that they can eat with comfort and independently. However, we changed our idea after the pre-makerathon event. During the event, we met John, one of the mentors for the course, and we decided to change our idea after hearing his personal story. We learned that there hasn’t been a watch that is accessible for him in the market: most watches require the whole hand to put on and take off. Even with simpler design such as a watch with magnet wrap, those can easily interfered with the manual wheelchair he was using. As a result, he had to abandon using the watch. However, if possible, he really wants to be able to wear a watch. After hearing his story, our team wanted to focus on this opportunity to invent a watch wrap that is accessible for people with limited pinching mobility.

We think the need for such an accessible device is huge. This type of design would enable people with limited pinching mobility to be able to wear a watch with just one finger. Specifically, we found that this design would benefit people with Charcot-Marie-Tooth. In our research, we realized that Charcot-Marie-Tooth is the most common inherited disorder that involves the peripheral nerves. In the United States along, it is estimated that 150,000 people have such disorder. On a global scale, 1 in 3,300 people would have such disorder. One symptom for people who have Charcot-Marie-Tooth is that they may develop weakness in their hands. This makes daily tasks such as writing and fastening buttons difficult. Similarly, wearing a watch independently is hard for them as well.

We have investigated the current market and deemed that the current products in the market don’t solve the problem. The traditional watch requires people to be able to put the wrap into the loop to lock the watch. This is very difficult for people with limited pinching ability. For sports watch that seems to be easy to put on, although it is easy for people to put their hands in the watch, it is still hard for people to lock it so that it would not move around the hand. The magnet wrap doesn’t work for people who use wheelchair because it will interfere with the wheelchair. The watch with slap band seems to work because people can just slap to put it on, yet it is hard for people to take off the watch. Because there is no watch that work in the existing market, we want to invent a watch that incorporates all the advantages of all the previous design.

traditional watch
sports watch
watch with slap band

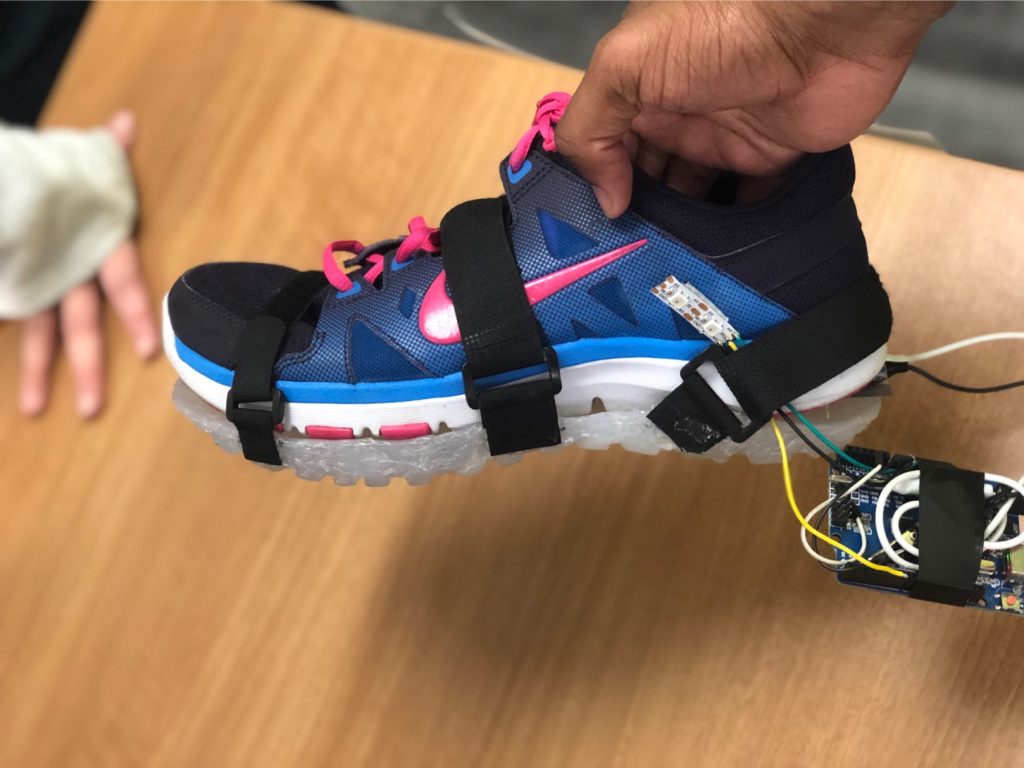
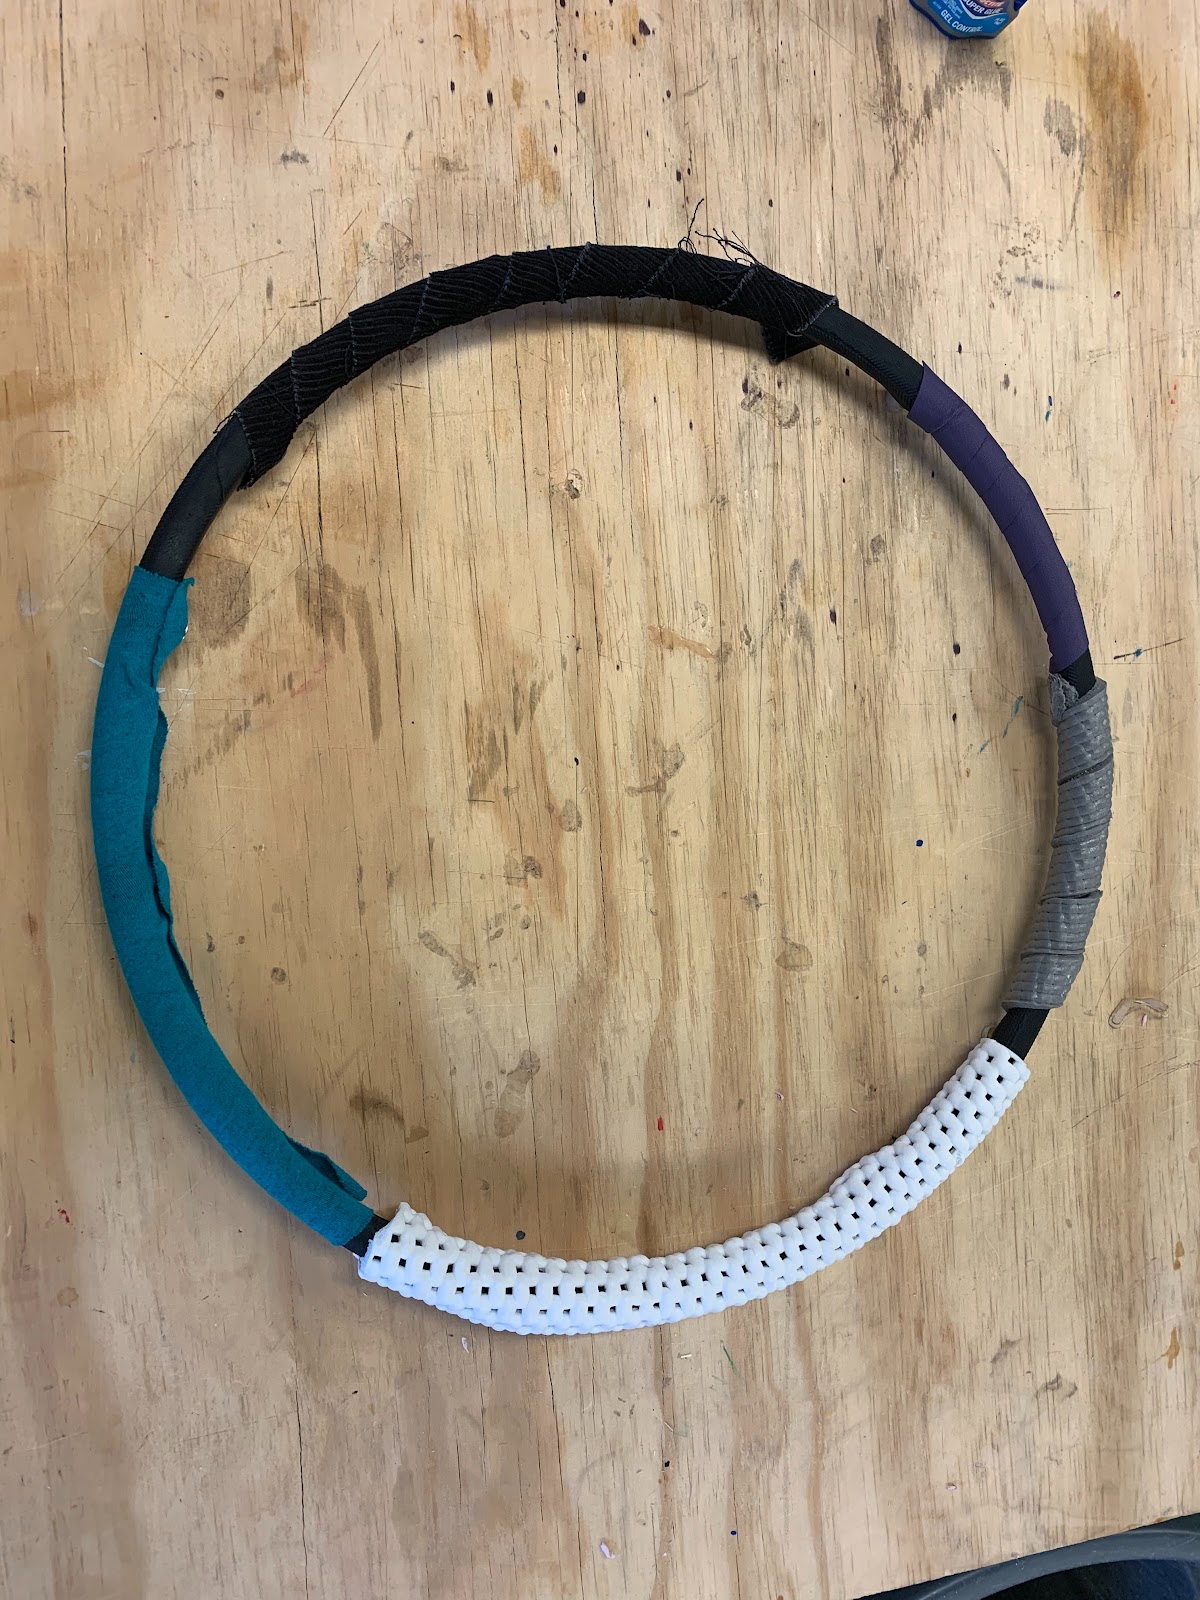
We started with sketches and low-fidelity prototype to investigate in the movement of wearing a watch. As the pictures below shows, we have used buttons and 3D-printed material to represent a watch in our prototype. We have also used different materials to test the wrap. After trying different designs, we thought the sports watch design was a relatively easy way to put the watch on the hand. We also found that the wrap need to be flexible enough so that people with different mobility and shapes of hands would be able to put their hands in the loop. After idea that we incorporated in our design was to use loops on the watch wrap. This idea was originated from John’s personal life experiences. His clothes has loops on them so that he could just use one finger to wear the clothes. We thought this was a very accessible solution and incorporated this idea in both putting on and taking off the watch. All those concepts are the basis of our design. Another feature that we added to our design was the hook. With previous features and Velcro, the watch was already useful. Nonetheless, we learned from John that he personally would like something more fashionable, and Velcro on the watch didn’t seem cool. Thus, we decided to come up with another version that enables the watch to lock without using Velcro. We started with using hooks in the design. After John tried the prototype and confirmed that the hook idea was feasible, we further looked into other materials that looked safer and more durable. Eventually, we came up with using hook and eye closure. It utilized the same mechanism and was easier to put on the watch wrap and more durable for the users. The users don’t need to be afraid that the hook may move in the wrap.

sketches

Our team used the gift cards that we received in the makerathon event to invent a real watch for John, and below are the pictures for the final product.

The cost of such design is very cheap. Since we only design the watch band, the cost of the watch is not included. The watch that we used in the design was selected by John and it costed $143.44. For other people who want a similar watch, they can buy a watch in the Amazon and only retain the watch portion. The price would vary depends on the actual watch the people choose. For the actual design, the main costs are two components: hook & eye closure, and elastic spool. Both of them can be easily found on websites such as Amazon. For the hook & eye closure, the unit cost was $1 each. For the elastic spool, we bought a 396 inch one for $7.99. In our design, we only used 8 inch which costs around $0.2. Therefore, the total cost of our design is around $1.2.

hook and eye closure
elastic spool

Moving forward, we think there are two possible ways to commercialize our design. The first one is to partner with a watch company. The watch company would use our design of the watch band to come up with accessible watch for the users. The second way is to create customized watch band for people who already have a watch. The users just need to provide the dimensions of the watch, and we can create the watch band that the users can put on the watch.

Team 2: Movi Final Project Reflections

Introduction

Hello everybody, we are team Movi! As a group this semester we came together in Professor Vishal’s BADM 357 Digital Making Seminar to combine our individual talents to come to a common goal of trying to make a difference. This semester we paired with Disability Resource and Educations Services (DRES) to work on finding opportunities where we could make a change. This was a phenomenal experience and opportunity for all of us to make a hopefully lasting impact on our community.

Our Mentor: Jenna Fessemyer

Jenna Fessemyer

Back in the first week of our course, we were happy enough to meet Jenna. Jenna is a current RA at Newman Hall and a senior studying Kinesiology here at the University of Illinois. Jenna has also been using a prosthetic leg her entire life. But oh boy that only fueled her to do more amazing things. Jenna is an avid runner and athlete who just one week ago complete the Boston Marathon. She first sparked our interest when she began to explain her story about her prosthetic leg. In our first meeting, Jenna explained how she has always had trouble walking in the wintery conditions that Champaign Illinois is accustom to for 5 months a year. She went on to explain that even though her prothetic C-leg is worth upwards of $100,000 she is still trained to fall on that leg. With that information, we were baffled to hear that even though her leg is so valuable and she is taught to fall on it in a crisis, there were not many options within the market. After that first day and meeting how amazing of a person Jenna was we were determined to make a difference.

Research

Our group first looked into the market of different prosthetic leg protection types. This helped us brainstorm different ideas and helped us examine the possible impact of our project. We also looked in the different materials and machines that are already available in the market. The first product that we looked into was Jenna’s current leg protection cover, the “Ottobock C-Leg Cover”. This leg protection was very bulky and was not very flexible due to its hard material, silicone. The other protections had a very slim pad of silipos gel. And it only covered the knee portion for Jenna.

Our group quickly realized that these leg protections have a lot of flaws and needed improvement. We were lucky to interview Jenna through this process and Jenna gave us some great insights. First, she told us that the “Ottobock C-Leg cover” can be improved by making the overall product less bulky, especially the back part where all the mechanism is located. Because the leg protection is too bulky in the back, she cannot bend her leg all the backward. With the silipos gel leg protection, Jenna also told us that she does not need protection above her knee. This product will actually hinder her from running and will not actually protect her expensive C-Leg. Lastly, Jenna complained about how the design is too bland. This made her neglect her form using prosthetic leg protections. She wanted to feel special and told us that she will feel more obligated to wear the prosthetic leg if the leg was designed to fit her style.

Prototyping

We thought the design process was going to be easy. However, we were wrong. At first, we went into the process blindly without knowing what our user, Jenna, wants. We tried to come up with our own designs and made prototypes based on the designs we came up with. And we quickly realized that those designs are similar to the volleyball knee pads in the current market. We tried to focus on the knee since it’s the most protruded out portion of the human anatomy. And we assumed that is the portion that needs the most protection. But after our meeting with Jenna, we quickly realized that this design challenge is much different than we first anticipated. We were testing our prototypes for the wrong user and we quickly scrapped the first prototypes.

Jenna showed us her C-Leg model and told us a few key points she wants in her design. She did not like the connection going around the back of her knee, because there is a lot of mechanisms that should not be disturbed. And she does not need any protection above her knee due to it limiting her movement. She also does not need bulky protection around her knee, because she only wants to protect her C-Leg since it’s a hundred thousand dollars. She also wanted the protection to cover her top and the side portion of the C-Leg. This is where most contact happens when Jenna falls on her C-Leg. Lastly, Jenna wanted the prosthetic leg protection to be able to easily attach and detach to her C-Leg.

With Jenna’s amazing insights and understanding of the market, we started brainstorming some ideations. We decided to make the straps come behind the leg protection, but it will not be in the way of the C-Leg mechanisms. Then we decided to use a hinge to easily attach and detach the prosthetic leg protection. With these insights in mind, we made two separate prototypes that illustrate our thought process. Now the C-Leg protection will protect the top and side part of the C-Leg and will not go all the way around the back of the C-Leg. This will make the overall design less bulky. Then the design will have a hinge for easy attach and detachment. Finally, the design cover can be customizable according to the user’s needs.

Overall, we wanted our product to be simple and slim compared to the old “Ottobock C-Leg cover”. Since we cannot have Jenna fall over every single time we make a new prototype, we needed to constantly ask her for improvements and refinements of the prototypes. I think the shin guard gave us a lot of inspiration. She shin guard only protects the shin and the side parts of the leg. So, we tried to follow it’s mechanism, but also fit the C-Leg. And most importantly, we wanted to create a protection that can be customizable according to the user’s preference.

Make-A-Thon

Step 1: We found it very helpful to make a 3D scan of the individual C-Leg. We used a scanner app to convert the image to a .stl file. Our mentor was out of town during our prototyping session so we 3D printer her scanned leg to use for her prototype. Even if you plan to prototype on your own leg, it still will be helpful to scan your leg if you plan on 3D printing because you can build your model design on the actual contours of the scan.

Step 2: We decided to use Acrylic and utilized inkScape to help shape and cut our design. After our design was cut we used a heat gun provided by the fab lab to mold the acrylic to the shape of our 3D printed model of the C-Leg

Step 3: We created the inner padding by using styrofoam and sheets of metal to hole shape to fit inside the acrylic. After the padding was complete we used our tough nylon to create a cloth outer coating and straps to help secure it.

Step 4: We split our acrylic down the middle and added a hinge to make the design easier to put on and simple to take off.

Step 5: Final steps of making everything fit together and ensuring it was up to the standards of safety we had set. At the end of the weekend, we were very happy with what we had put together.

Post Make-A-Thon

After we won the judgment portion of Make-A-Thon we were very excited to continue with our idea for the remainder of the semester. The next week we were able to meet up again with Jenna, our mentor, and do some testing. Overall, the testing went great. We had followed the testing protocol that we had constructed a couple of weeks earlier and were able to work with Jenna. She really liked the way we incorporated different materials and really thought our design was super cool and represented her personality well. There were also definitely areas we needed to improve. The 2 areas that we could improve were to make the interior less slick so the guard would stay secured on and use a more flexible exterior material and make the design less bulky.

The next week we came back to the Art and Design Building and kept working on additional prototypes. To address the bulkiness we took out the interior padding and wanted to change it to silipos gel. Then finally to address the concern of the slickness of the pad we painted the inner nylon layer with a plastic dip which we believed to create more friction between the nylon and the metal part of Jenna’s calf.

Moving Forward

Even though the semester is over, our project will continue forward. We shared our plans on how we are going to take this further if we have more time. For example, we wanted to test our prototypes with more users. Jenna and Jeannette have been our great users throughout this process. However we learned from this class that everyone has their own opinions and the more user group, the stronger our project will become. For instance, every age group has their own opinion for certain designs. Jeannette wanted a huge padding on top of her C-Leg, whereas Jenna wanted minimal padding on top of her C-Leg. They had to do due to each group age’s daily routine and how often they fall on their prosthetic leg.

Next, we wanted to manufacture for a larger group. We were thinking about partnering with prosthetic leg companies to figure out the different scale of each prosthetic leg. This will give us a general database of how big we should make our prosthetic leg protection. We can maybe narrow down the prosthetic leg protection size into five different sizes.

Ultimately, we want to meet with our users one on one and ask them questions to create a prosthetic leg protection that is for that specific user. We will need to coordinate the size of the prosthetic leg, the color of the prosthetic leg protection, the overall design of the prosthetic leg protection. This may cost more time and effort, but overall it is worth the investment.

Final Presentations Slides

Team 3: Project Reflection

Introduction:

Welcome to Vizallo! Throughout the semester, we built silicone cover solutions to prevent water from damaging electronics in power wheelchairs. We are a team of 4, comprised of 2 technical business students, a computer science major and a very talented industrial designer.

Ryan’s Story:

Our journey began when we were introduced to Ryan, a recent UIUC graduate and a power wheelchair user himself. We heard unbelievable stories of his multi-thousand-dollar machine simply powering off in the rain because of circuit leakage – and we could not believe it. Ryan resorted to literally using a Ziploc bag to protect the electronics to avoid being stuck helplessly in the rain, banking on kind pedestrians to assist him in getting under a roof. It didn’t take us long to commit to embarking on this semester-long design challenge and trying to help Ryan find a sustainable way to stay dry in the rain.  

Research:

We first decided to look into the market to identify the different options that are available for the purpose of protecting the electronics on the power wheelchair. Although there are several brands with the offerings, most of the options available apply the same concept. They look like a little quarantine tent, where the user would insert his or her hand into to operate the joystick of the power wheelchair.

We realized that these types of covers have many flaws and thus, a big space for us to make improvements on. For example, there are many complaints about the product not being able to hold against heavy rain. It could successfully prevent light drizzles from entering through but under heavy rain, the water could still enter through, thus failing to provide its primary purpose of protecting the electronics of the power wheelchair from the weather. Additionally, because the products are so big and bulky, the users always take them off when it is not raining outside. This means that the users often forget to bring the products with them or get caught in the rain by surprise without having access to them. Furthermore, the designs of the products are not appealing to the users, discouraging them from continuous use.

Design Process:

The design process was not easy. To create what seemed to be a simple solution, such as using an umbrella, was not beneficial for our user. This is when we really became challenged by the design prompt. We came up with extreme ideas from protectant fields to very simple ideas such as utilizing saran wrap. After talking with Ryan about his desire to ride in a Ferrari, our perspective changed and we realized that in order to design something effective, we had to thoroughly consider the user. Coming to this awareness really enabled us to focus on the actual problem, which is to protect the joystick. Although we thought of coming up with solutions that will protect the entire chair from the rain or even his hand, in order to design effectively, we had to consider how every aspect of our design was going to affect Ryan.

After gaining an understanding of what is available on the market, we decided to poke around other protective covers to gain inspiration for our product. We did not limit ourselves to the power wheelchair related products and looked far beyond. For example, we looked into baby strollers and convertible cars to gain inspiration for the “armadillo-style” protective cover. We even looked at phone cases to come up with an idea of a “perfect-fit skin” for the arm of the power wheelchair.

Our goal was simple: create a product that is easy and effective. Since we could not exactly predict the other weather conditions that may come with rainfall such as wind, we had to simplify some of our ideas. This is when the phone case idea provided major inspiration. The phone case is an everyday product that is not only practical but also customizable. Those are two characteristics that we did not notice in other power wheelchair protective covers available on the market. So from there, our goal was to create a product that serves as a skin cover for the joystick, thus allowing it to be mobile, simple, and provide a room to add customization.

Make-A-Thon:

Leading up to the Make-A-Thon, we spent most of our time brainstorming. Going into the Make-A-Thon, we had a solid idea of what we wanted to produce but we weren’t quite sure of the process. Our first step involved creating a mold of the joystick. Since we did not get to scanning and 3D-printing the actual joystick until weeks later, we created a model of a joystick out of styrofoam. After this stage, we were again, unsure of our next steps, and so we tried to develop a prototype that incorporated everyone’s ideas.

We decided to develop on the sleeve cover idea, for which, we tried out the heat gun. The goal was to use heat in some way to get the plastic to shrink to the form of the joystick prototype. Unfortunately, this was not very successful. Some of the plastic and styrofoam melted and the rest refused to stick to the prototype. However, what we did discover was that the plastic, when heated would stick to itself. Therefore, after we came up with another idea, which was to cut the fabric into pieces and piece the pieces together with hot glue, we utilized the heat gun to seal the seams.

While looking for inspiration, we also ran into covers/skins with texture such as the one on game controllers. This inspired us to make grips out of moldable plastic that we then added to our prototype for additional support when the joystick gets slippery. The overall process worked out great and after we added a couple of details, we were done with the prototype for the Make-A-Thon.

Post-Make-A-Thon:

After the Make-A-Thon, we continued to work on the next version of the prototype, which would be closer to what we would hope to put on the market. In order to make the prototype more accurate, we scanned the joystick of Ryan’s power wheelchair, with which we 3D printed the mold. Unfortunately, due to the size of the arm of the power wheelchair, we had to scale the mold down and only focus on the part with the joystick to serve as a demonstration. With the scan of the arm of the power wheelchair, we used Meshmixer to isolate the part with the joystick. We also used the software to fill any gaps from the scan.

The file was then transferred to Fusion 360, where the mold is designed based on the scan. Our idea is that we have a base of the mold with the scanned joystick, which will be enclosed by the top that has a slightly larger negative image of the joystick. Therefore, when the top encloses the base, there will be a slight gap between the base and the top, through which silicon will be inserted to produce the sleeve cover. We were unable to try the silicon injection but we were able to successfully print out the top and the base of the mold.

Next Steps/Testing:

Although the semester wrapped up and the project ended, we decided to share what we have planned on doing further if we were to have more time. For example, we planned on performing more user testing. This will allow us to gain perspectives from the other power wheelchair users and also test the scalability of the product by having them give us feedback. This will also give us valuable insight into the user interface/user experience process of putting on and removing the silicone cover. Since certain users may have less dexterity function than Ryan, we must ensure that we can accommodate everyone.

Next, once we have validated with a broader range of users, we would look into manufacturing the silicone cover at a slightly larger scale. However, we will probably only leverage the database we would have built up from working one on one with the other power wheelchair users. Nonetheless, since there is such a limited amount of power wheelchair manufacturers, this would help us cover a substantial part of the market.

Ultimately, we would look to encompass the rest of the market through more one-on-one testing and database logging or try to leverage the OEMs and use their molds directly from the production line. This is where the large scale manufacturing and distribution comes into play, otherwise known as our moonshot.

This is an enormous industry as a whole. According to Smart Chair, the power wheelchair market alone was valued at $3.9 billion. This is a large market which can be easily infiltrated due to the staggeringly low amount of wheelchair manufacturers that exist. According to IBIS World, there are only 21 wheelchair manufacturers in the US, and it is likely that not all of them make power wheelchairs.

Hence why we justified growing a digital database one-by-one based on individual user testing. Since there is a maximum of 21 different models which we would need to model and manufacture for, hustling and meeting users of each type is not completely out of the question. The manufacturer concentration in this market actually plays heavily to our long-term advantage.

The final presentation for my team can be found here: Team 3 Final Presentation.

Team 3D BAL: Finding Balance for Yoga

For our project this semester, we created products that would assist users that have difficulty balancing when performing various activities. We identified this particular need in the market after a discussion with our mentor, Jenna Fesemyer. During our first visit to DRES, Jenna spoke about a variety of difficulties facing prosthetic users. When she spoke about her enthusiasm for practicing yoga and the difficulties she has balancing in certain poses, we agreed this was something we wanted to pursue. We decided that it would be interesting to find a solution to this challenge because it is a rare and unique opportunity to work on a product that focuses on recreational purposes versus on a daily need. We used the sticky note activity to help hone in on what this opportunity presented.

First, we needed to understand Jenna’s prosthetic leg to understand where the limitations stem from. Her prosthetic has some limitations and does not perfectly mimic an actual human leg. However, it also has some functionality that almost extends the functionality of her prosthetic past that of a sound limb. For example, Jenna’s prosthetic leg has the limitation of having no ankle movement, so the entire leg has to be supported from her residual thigh and microprocessor knee. However, her microprocessor knee has the ability to “lock” in place, so that if she is in a squatting or kneeling position, her knee will lock so that it supports her in that exact position.

To gain a better understanding of the opportunity so that we could design an effective solution, we needed to delve into research before moving ahead. We gained a lot of useful perspective from an ARC yoga instructor, Marsha at Yoga for Amputees, and Jenna herself. From these interviews and discussions, our team was first set on creating a prosthetic foot that Jenna will insert into her microprocessor knee before yoga practice sessions. The initial design included an insertable rod as the main part of the prosthetic and a flipper-like base that would provide Jenna with more support with increased surface area. To visualize the idea, we created a low-fidelity model. As soon as they were created, we met with Jenna to see what her initial thoughts were regarding our prototype. Jenna suggest that we move the rode to the center of the foot rather in the back like a typical leg so that she will have equal support on all sides.

At the same time, we received feedback from Marsha at Yoga for Amputees and she commented that she has seen some prosthetic leg users creating their own DIY “yoga prosthetics”. These users used a base that had more of a “plunger-esque” shape rather than the flipper shape we initially designed. We shared the feedback from Marsha with Jenna and she also confirmed that she believes that a circular base would be the most stable, and having a little suction could provide even more stability when she practices yoga. However, she commented that the suction would have to be weak enough to easily be picked up, as yoga often involves flowing from one position to another. As a result, we created some sketches for a new design based on the feedback.

During this same period, we also met with William, a FUSION 360 expert at MakerLab, and he provided us with sketches that more closely mimics an actual human limb. The sketches created with his assistance had multiple joints that would provide her with more flexibility and movements.

After taking time looking at all of our sketches and low-fidelity models we crafted, we realized that these solutions would only be usable by a small market. A prosthetic replacement could only be used by prosthetic users, which greatly limits the general market of people who have difficulty balancing. The Make-a-Thon introduced us to the residents of Clark Lindsey as potential users and points of inspiration. Thus, during the Make-a-Thon we decided to focus on a more “sandal-eque” product design that will be accessible to a wider range of users in the market versus than just prosthetic limb users that practices yoga. The Clark Lindsey representative that the bathroom is one of the most dangerous rooms in the home regarding falls. Thus, we pictured one scenario that this design could fit in is in bathrooms in front of the sink where elderly people could slip and fall easily and regularly stand for longer periods of time. The design we came up is shown below. We also applied an additional layer of material on the base that provided the shoe with more grip and locks better on to a yoga mat material when practicing yoga.

Soon after Make-a-Thon, we were eager to share and test our product with our mentor. Her reaction to our product was mostly positive as the sandal was able to provide her with more balance than her usual prosthetic. However, the underlying issue was that the sandal could not provide her with any upper calf support. In order to address this, the team decided to abandon our attempt to create a functional product for a larger audience and revert back to our “plunger-esque” prosthetic limb that would cater to specific individual users. Although the target market is smaller, this design could still be very useful for any prosthetic user. This issue is also not being addressed by other designers or companies as we have been able to find through our research, even though there are specific prosthetics for many activities like running and pointe ballet.

We then created a model through FUSION 360 and printed a scaled prototype. Jenna was worried about having that much movement in the “ankle” so we created the file below to print a full scale version for Jenna to test on.

However, when Jenna went to put on the first print, she was not able to insert it into her prosthetic. She realized that the inside of her prosthetic actually was not hollow, and we would need to create a divot for her prosthetic to be able to slide on. We then designed the following file and printed it for her to try out.

Jenna was really happy with the design! The only thing left to do is add some of the cork material that was on the bottom of the additive design to give a touch of height and more traction. We are very happy with the result as well as she said she could definitely feel increased lateral stability and thinks it is a really cool design to have!

You can see our final presentation here.

Project Solestice: A Tread With Soul

THE BIRTH OF SOLESTICE.

Almost everyone has, at one point in their lives, experienced the pain of slipping on black ice. This could be a story that your friends constantly make fun of you for, or a silent embarrassment you keep to yourself (and your neighbors who saw the whole thing). Slipping on black ice is definitely something that conjures a vivid image in everyone’s mind, and it was for this reason that our team felt such a connection with Jenna when we first interviewed her. The first time we met our mentor, Jenna Fesemyer, was during a large group interview our class conducted at the Disabilities Resources & Education Services (DRES) building. Our entire class was present to hear Adam, Arielle, Jenna, Ron, and Ryan talk about their frustrations. Jenna shared with us the story of a time where she slipped on ice immediately upon exiting her car and lamented the fact that she could not even wear boots for more traction in situations like these. We found out that the boots heavy weight prevented Jenna and other prosthetic users from wearing them as their residual limbs are not strong enough to carry too much weight. During our team discussion the following week, we decided to try to find a way for Jenna to increase traction without adding to much weight, and Project Solestice was born. Solestice’s goal is to create an attachable shoe tread that can be used to travel in a variety of rough terrains, with our first focus being on icy terrains.

First meeting/interview with our mentors.

A RESEARCH OPPORTUNITY.

Throughout class, we worked on different parts of the prototyping process, conducting interviews, researching different materials and methods, and defining the challenges and opportunities that inspired us. Solestice identified four opportunities: 1) prosthetic users cannot wear heavy-weighted shoes (like boots), so we will make an attachable tread that is optimized to be lightweight; 2) prosthetic users often fail to shift their full weight on their prosthetic leg, so we will use arduinos to create force feedback; 3) prosthetic users may have difficulty putting shoes on, so we will use elastic and design an easy to use mechanism; and 4) prosthetic users prefer an aesthetically pleasing design, so we will use lightweight, translucent material to make the tread less conspicuous. With the four identified opportunities, we took to the time to interview our mentor who is a prosthetic leg user, Jenna Fesemyer; a materials science professor, Matthew Goodman; and a professor who is also a shoe cobbler, Salman Raheel. Through this process, we found out that thermoplastic material is both lightweight and has enough traction to be effective. We also brainstormed many ways to attach the tread onto the shoe. At first, we believed that having spikes on the tread would help the most and made a low fidelity prototype based on it, but we ran into a problem when we realized that the user may have to take the tread off when walking indoors.  The stage was set, and all we had to do was wait for the Make-a-thon event to start creating our very first functional prototype.

Our low fidelity prototype.

MAKING IT OUR OWN THING.

During the Make-a-thon, the work we did on the prototype could be broken down into three sections: Arduino, molding, and attaching.

Arduino

For the Arduino portion of the prototype, we coded an Arduino Uno to illuminate LED lights when a certain amount of pressure is put on the tread; in other words, we created a basic Arduino based pressure sensor. To create the pressure sensor, we sandwiched a piece of foam with two pieces of copper. Ideally, we wanted for there to be three lights, each indicating where the user is putting pressure on the tread. This would enable the user to ensure they are putting enough weight on their prosthetic to maximize stability. The data collected from the tread could also eventually be collected and viewable in an app.

Molding

Using a molding compound and a cheap shoe we bought, we created a mold of a shoe outsole. During this process, we coated the shoe in baby powder and mixed the molding compound to a viscosity similar to pancake mix. We held the shoe down until the mold dried. Following, we used a hot glue gun to fill in the mold with thermoplastic material. After the mold was completely filled, we used a heat gun to smooth the top of the sole, making sure the edges were slightly taller than the inside of the sole. The thermoplastic material we used was similar to silicone and, per our research, is a material that creates enough friction to prevent falling on ice. Ideally, given more time, we want to be able to create the tread design ourselves with the information that we learned from Prof. Goodman on which type of tread design would be most effective for black ice. However, due to the time constraints of the weekend event, we made do with created a mold from the materials on hand.

Attaching

Due to time constraints, we attached the tread via Velcro. While we are not completely satisfied with this method, we were constrained by our budget, time, and materials. Ideally, we would like to use a clear, elastic material to follow the aesthetic we have already created. We will expand upon this more when we talk about testing, however, we are definitely aware that one of our biggest opportunities for further improvement is to research better, more aesthetically pleasing attachment methods. We want to find an attachment method and material that is easier for users to put on than Velcro. One way to possibly do that is to have less straps than we currently do with elastic material so that the Velcro mechanism is not too difficult a barrier.

First Prototype

Our first prototype was created from thermoplastic material and attached via three Velcro straps. In the back, we attached an Arduino which enables force feedback. This gives the user the opportunity to analyze where they are applying the most pressure and adjust accordingly. The tread weighs about 1.198 lb with a sneaker (0.598 lb individually), compared to the about 2 lb weight of a regular snow boot.

TESTING OUR METTLE.

Following the Make-a-thon event, we were able to test our prototype on three users: Jenna Fesemyer, our mentor and a prosthetic leg user; Jennifer Clifton, our Make-a-thon teammate and a person with brittle bone disease; and Kim Harden, an elder. While not all our testers were prosthetic leg users, they were all analogous users who would have a use for a tread like this. The feedback that we received was that while the tread itself did its job, the straps were difficult to put on, and the Arduino should probably used as a diagnostic instead of a daily part of the tread. While the tread had incredible “grippy”-ness, we along with most of our testers, felt that it was still a little bit too thick, and that during production, there is an opportunity that we need to identify where we can thin out the tread and make it even lighter. Furthermore, during testing, Jenna told us that she felt that because of the strap and how difficult that is to put on, the tread is not something she felt could be used every day. So, just like an umbrella, Solestice’s tread has a problem where if the user forgets to bring the tread out or wear it during icier days, it will not be of use. Some ways that we have thought of to try to improve this problem is to make either make the attachment mechanism easier or find some way to adhere the tread directly onto the shoe. Finally, Jenna thought the tread aesthetic looked very cool, and Kim thought it made her feel younger.

THE FUTURE IN OUR PALMS.

As mentioned before, there are several ways in which we would like to improve the prototype of Solestice treads.

Researching Even More

There are many topics that we have to do more research on. First, we want to confirm that the thermoplastic material we used is the material that can give the best traction. Next, we want to do even more research to create our own design to optimize the tread for black ice. We know from our interview with Prof. Goodman that a tread with a larger amount of surface area would be the best for black ice, so ideally, we would design something similar to the tread pattern of a winter tire. Furthermore, another idea that we want to look into is either adapting the tread or finding a material to make the tread shock absorbing in order to decrease the weight of the shoe for prosthetic leg users.  Finally, we will be researching into whether it is possible to incorporate some type of cushioning for further comfort in the tread attachment without having to sacrifice the weight of the tread.

Business in the Long-Run

If we can raise enough support for Solestice treads, we feel one of our best options would be to partner with a shoe company. With this partnership, we can engineer a method of attaching the tread directly onto the shoe so that users of the tread can always have the tread on. Alternatively, more information from a partnership with a shoe company could give us data that allows us to create an easier, less complicated attachment contraption. Furthermore, we would gain more information on shoe designs in order to optimize our tread design. Partnering with a shoe company would also give us access to mass production machines, allowing us to create molds more efficiently, better control the thickness of the tread (thus making it thinner and lighter), and customize the tread aesthetics (offering more colors and aesthetic designs).

Additionally, the Arduino portion of the tread, once shrunk to be more compact, can become a separate product marketed towards physical therapists who help prosthetic leg users, the elderly, anyone else that has unstable footing, and even athletes. Through this, we can track data on where people put pressure on their feet and understand more on how that affects posture and other health areas. Eventually, an app tracking this information can be created and the data analyzed to help prosthetic leg users better trust their leg, the elderly understand how to stabilize their footing, and athletes where to put pressure when running or participating in other activities to achieve the best result. Said data could be sold to sports coaches, medical professionals, and other researchers. This data can also help people with lesser problems, such as duck feet.

To see our final presentation on Project Solestice, click on the following link.

To see our Instructable (detailed instructions on how to create our prototype), click on the following link.

This post was co-authored by AJ Poe , Emma Bradford , and Trevor Sibby.

Team Four Project Reflection

Since the class we met the mentors, we knew we wanted to work with Arielle. We were inspired by the way she made awesome use of her time in this class and really made something worthwhile. Arielle really saw an opportunity for change and improvement and through this class was able to even create a business out of it. We were also excited about the area of opportunity she presented and the idea of potentially helping our U of I  team and her company. After meeting with her and Adam, they explained to us the main problems they have when it comes to racing. They showed us the gloves and how they work in part with the hand ring on the wheel.

They told us the major issues they face is that when it rain, it becomes very slippery between the hand ring and the glove. This causes the athlete a lot of trouble as they can’t get as good of contact between the glove and hand ring. Once the weather conditions become poor, it doesn’t matter how much the athlete trained or how fast they race if they can’t make good contact.  We worked with Arielle and the paralympic wheelchair racers to find a better way to cover their hand rings in preparation for a race.

The other problem they face is the fact that there is no easy way to cover the hand ring. The hand ring is made of aluminum, so they need a cover to create friction as well as protect the athlete from injury. Adam told us of the many solutions he has tried over the years to solve this problem, as there is not a solution that exists on the market. Currently, they use a bike tire which they have to carefully place and glue around the hand ring. This is a daunting process that takes a very long time. The cover lasts for a few months, and then they need to be replaced. In order to remove the cover, they have to either heat it with a heat gun or put the ring in the oven to be able to get the cover off.

After meeting with Adam and Arielle, we were able to formulate our opportunity statement. We decided our goal was to work with Arielle and the paralympic wheelchair racers to find a better way to cover their hand rings in preparation for a race.

Tire Cover
Hand ring with tire cover
Worn down tire cover

Initially, we hoped to solve the challenge of how to help the racers in bad weather conditions. Going into the Makeathon, most of our ideas included creating a cover for the hand ring. After meeting with a materials science professor and tips we received from Milestone Labs, we begun to consider what material might be able to create the best kind of friction with the glove when wet. We considered a snap cover, zipper, fabric cover and more. We purchased a variety of materials including a bath mat and a yoga mat. During the Makeathon, we quickly realized that our materials were very soft and didn’t withstand even minimal testing with the glove. We looked around the FabLab for scrap materials from other groups. We found some nylon, as well as a dip plastic rubber called Plasti Dip. We created this low fidelity prototype using our materials. Since we only had two hand rings, one covered and one uncovered, we had to create sections for each material.

Makeathon Prototype

After testing each section, we found that our most promising solution was to pursue to Plasti Dip. We discovered that there was a spray version available, which seemed to be a good and easy option. After the Makeathon, we purchased a can of the spray Plasti Dip to create another prototype. We used the spray booth in Art + Design to coat the hand rings and the gloves. The spray was so easy to use. We did the recommended three coats, waiting 30 minutes between each and four hours for it to dry. After it had dried, it had created a nice even coat that was slightly sticky to the touch.

Plasti Dip Spray
Hand ring in the spray booth
Dried hand ring

We met with Joey Gibbs from the racing team to test the prototype. Once we arrived at the DRES morning practice, Joey was able to remove one of the hand rings from his chair and attach our prototype to it. The glove we had sprayed was not Joey’s size, so he wants able to test the glove with the ring. However, we did see Jenna, another racer and mentor from our class, and she was able to test the glove for us. After going about 40 feet, the Plasti Dip on the glove started peeling away immediately. We quickly realized this was not a solution.

Worn Plasti Dip glove
Joey testing our prototype

Once Joey was ready to start practicing using our prototype, he quickly realized that the Plasti Dip created the perfect amount of friction between his glove and the ring. It was sticky enough to create a good grip, but not too sticky that it slowed down his stroke. After about five minutes of Joey practicing at a regular speed, we could see that the rubber spray coating was starting to peel away. Even though it was peeling away, it didn’t affect Joey’s speed or efficiency. After about 15 minutes, the rubber on the ring was almost worn away. We noticed that one section of the ring, however, was withstanding Joey’s strokes. Once we took a closer look at the ring, we realized the part that was no peeling was the part that we had coated with Plasti Dip at the Makeathon. This lead us to believe that our potential solution might be stronger if both types of Plasti Dip are used or if more coats are applied. In the end, Joey had found that his overall speed was actually 1 mph faster with our prototype than normal. This was an exciting finding! We think that if the team pursues trying this material in various ways, they might find a solution that is easier and more effective.

https://docs.google.com/presentation/d/e/2PACX-1vSCPDDCCokGwA8hs1wBHu_bRoGwgRjhVs2W5UG2UGHB3l1FVsAkUVdL-gtAf-c7rRGiOpEtxQq7OQ6P/pub?start=false&loop=false&delayms=3000